Mastering RV Maintenance: Water Tank and AC Tips from an RV Rider
Hey fellow RV riders! If you’re like me, you know the joys and challenges of life on the road. Today, I’m diving into some of the most crucial aspects of RV maintenance: keeping your water tank clean and installing and maintaining your air conditioner. Plus, I’ll share tips on powering your AC with solar panels. Ready to hit the road with confidence? Let’s roll!
Thank you for reading this post, don't forget to subscribe!Keeping Your RV Water Tank Clean
A clean water tank is vital. Trust me, nothing ruins a trip faster than funky water. Here’s my go-to guide for keeping your water tank pristine.
Why Clean Your RV Water Tank?
Dirty water tanks can lead to bacterial growth, causing illness and bad odors. Regular cleaning keeps your water safe and your tank in good shape.
When to Clean Your RV Water Tank?
Aim to clean your water tank every six months. If you’re a frequent traveler, consider cleaning it more often. Always clean it before storing your RV for a long time.
How to Clean Your RV Water Tank
- Drain the Tank: Start by draining the tank completely. Open all faucets and let the water run out.
- Prepare a Cleaning Solution: Use a mixture of bleach and water. A common ratio is one cup of bleach to four gallons of water.
- Fill the Tank: Pour the solution into the tank. Fill the rest of the tank with clean water.
- Run the Solution Through the System: Turn on all faucets until you smell bleach from each one. Let the solution sit in the tank for at least 12 hours.
- Drain and Rinse: After 12 hours, drain the tank and refill it with clean water. Run the water through all faucets to rinse out any bleach residue.
- Repeat if Necessary: If you still smell bleach, repeat the rinsing process until the smell is gone.
Tips for Keeping Your Water Tank Clean

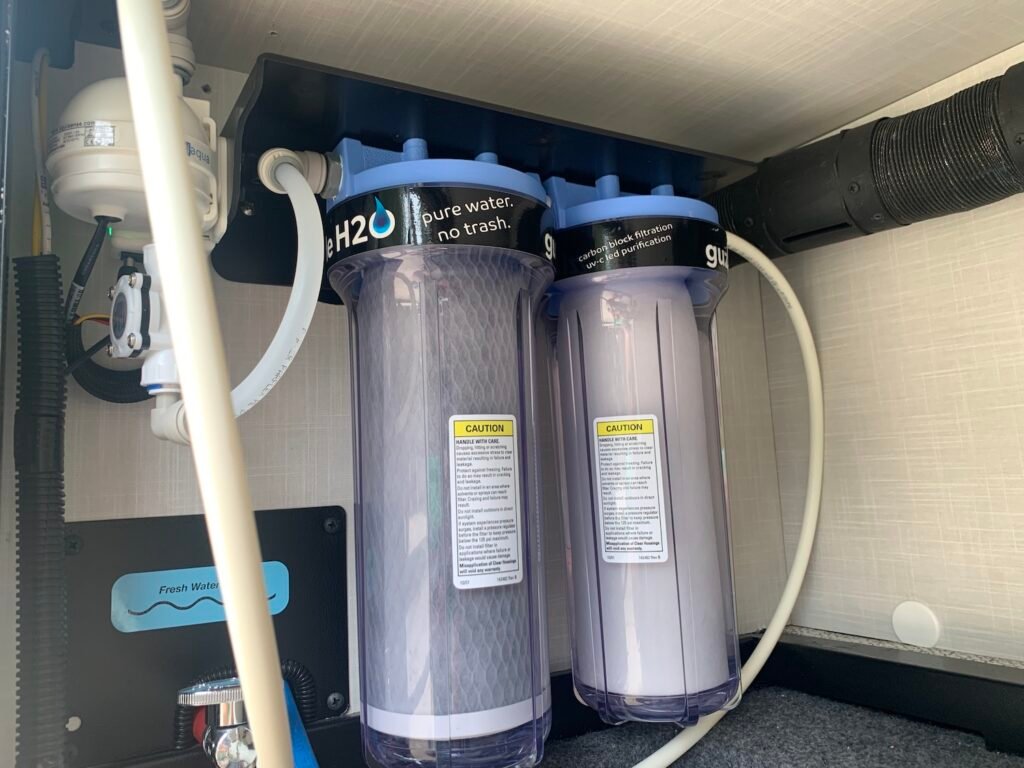
- Use a Water Filter: Always filter the water when filling your tank.
- Avoid Untreated Well Water: Stick to treated water sources.
- Inspect Hoses and Fittings: Regularly check for wear or contamination.
- Check Water Quality: Invest in a portable water quality tester. It helps detect contaminants and ensures your water is safe.
Installing and Maintaining Your RV Air Conditioner
Nothing beats a cool RV on a hot day. Here’s how to install and maintain your AC like a pro.
Why is Installing an AC Important?
Proper installation ensures efficient cooling and prevents leaks, extending the life of your AC unit.
How to Install Your RV Air Conditioner

- Choose the Right Unit: Ensure the AC unit is compatible with your RV. Check the size and power requirements.
- Gather Your Tools: You’ll need a screwdriver, sealant, and possibly a friend to help.
- Remove the Old Unit (if replacing): Unscrew and carefully remove the old unit.
- Prepare the Opening: Clean and prepare the roof opening. Ensure it’s free of debris.
- Install the New Unit: Place the new AC unit over the opening. Secure it with screws and apply sealant to prevent leaks.
- Connect Electrical Wiring: Follow the manufacturer’s instructions to connect the wiring.
- Test the Unit: Turn on the AC to ensure it’s working properly. Check for any leaks around the unit.
Maintaining Your RV Air Conditioner
- Clean the Filters: Clean or replace the filters every month. Dirty filters reduce efficiency and can cause the unit to overheat.
- Check the Coils: Inspect the evaporator and condenser coils. Clean them with a soft brush or vacuum.
- Inspect the Fins: The fins can bend over time. Use a fin comb to straighten them.
- Check for Leaks: Regularly check for any leaks around the unit. Reseal if necessary.
- Schedule Professional Maintenance: Have a professional check your AC unit at least once a year.
Tips for Keeping Your Air Conditioner in Top Shape
- Use a cover when the AC is not in use.
- Avoid running the AC on low voltage.
- Keep the area around the unit free of obstructions.
Powering Your AC with Solar Panels
Using solar panels to power your AC is an eco-friendly and efficient option. However, it requires proper planning and setup.
Why Use Solar Panels?
Solar panels provide a sustainable energy source. They reduce your reliance on campground hookups and generators, which is especially useful for boondocking.
How Powerful Should Your Solar Panels Be?
The power requirement for your AC depends on its size. A typical RV AC unit requires between 1,500 and 2,000 watts to start and around 600 to 700 watts to run continuously. To determine how many solar panels you need:
- Calculate Your Power Needs: Determine the wattage of your AC and other appliances.
- Check Solar Panel Output: A typical solar panel produces between 100 and 300 watts. For example, to run a 700-watt AC unit, you would need around three to four 300-watt panels.
- Consider Battery Storage: Solar panels charge your batteries, which then power your AC. Ensure your battery bank has enough capacity to handle the load.
Installing Solar Panels
Explore how solar panels and electric storage combine to create an unbeatable portable solar solution. A solar generator is a reliable and clean power source for campers, RVs, or as an emergency backup if your power goes out.
- Choose the Right Panels: Select panels that are compatible with your RV’s power system.
- Install Mounting Brackets: Secure the mounting brackets to the roof of your RV.
- Attach the Panels: Place the panels on the brackets and secure them.
- Connect the Wiring: Run the wiring from the panels to the charge controller and then to the batteries.
- Test the System: Ensure everything is connected properly and test the system.
Tips for Maximizing Solar Efficiency
- Park in sunny spots to maximize solar absorption.
- Keep panels clean and free of debris.
- Use a solar monitoring system to track performance.
Auto Parts Expert-OEDROOEDRO
Focus on excellent quality and dedicated service for years so as to bring you the best auto parts. We offer hundreds of parts and accessories, outstanding design, coupled with affordable price, our products ensure you have a safe journey.Our experts will help to equip your vehicle with the perfect car parts while adding coolness to your vehicle. Keep your car running in the best condition here.
Basic Maintenance Essentials for Your RV
Keeping your RV well-maintained involves having the right tools and supplies. Here are some basics you should always have on hand.
Essential Tools
- Screwdrivers and Wrenches: For general repairs.
- Multimeter: To check electrical systems.
- Sealant and Caulk: For sealing leaks.
- Cleaning Supplies: For tanks, filters, and general cleaning.
Essential Supplies
- Water Filters: To ensure clean water.
- Spare Fuses and Bulbs: For electrical repairs.
- Lubricants: For hinges, locks, and slide-outs.
- Spare Hoses and Clamps: For plumbing repairs.
Regular Maintenance Tasks
- Inspect Seals and Seams: Check for leaks and reseal as needed.
- Check Tire Pressure: Regularly check and maintain the correct tire pressure.
- Test Battery and Electrical Systems: Ensure your battery is charged and all electrical systems are functioning.
- Clean and Inspect the Roof: Clean the roof and check for any damage or wear.
Summary
Maintaining your RV’s water tank and air conditioner is essential for a smooth and enjoyable journey. Regular cleaning, proper installation, and routine maintenance can prevent many common issues. By following these tips and considering solar power for your AC, you’ll ensure your RV stays in top shape, ready for any adventure. Happy RVing!


